For creators
Offer letters: invite people & issue branded, verifiable letters
Invite people to a course, a 1:1 coaching session, or a paid webinar — and once they pay, they download a personalized, verifiable offer letter carrying YOUR company name, signatory, logo, signature and stamp. It's a complete, compelling letter — warm intro, a perks list, an acceptance call-to-action and a hand-signed sign-off — and nothing is hardcoded; you set every detail.
Last updated Jun 19, 2026
What it's for
Use offer letters when joining your program should feel official. A test-prep school confirming a cohort seat, a company onboarding interns, an academy welcoming a new intake — each person who pays gets a clean, signed, verifiable PDF letter on your letterhead. It is an enrollment / offer letter (it confirms a seat), not a guarantee of employment, and the footer says so.
- Works for three things: course access, 1:1 coaching sessions, and paid webinars.
- Fully yours — company name, issuing organization, signatory, logo, signature image and official stamp are all things you provide. The platform hardcodes nothing.
- Verifiable — every letter has a unique DOC-ID and a public verification page anyone (a recruiter, a university) can open.
- Gated on payment — only people who have actually paid can get a letter; nobody can self-mint one.
Open it
Dashboard → Teach → Offer Letters (/dashboard/letters). It's a three-step wizard: Company, Recipients, Send. Only instructors and admins can use it.
Step 1 — your company (prefilled, editable)
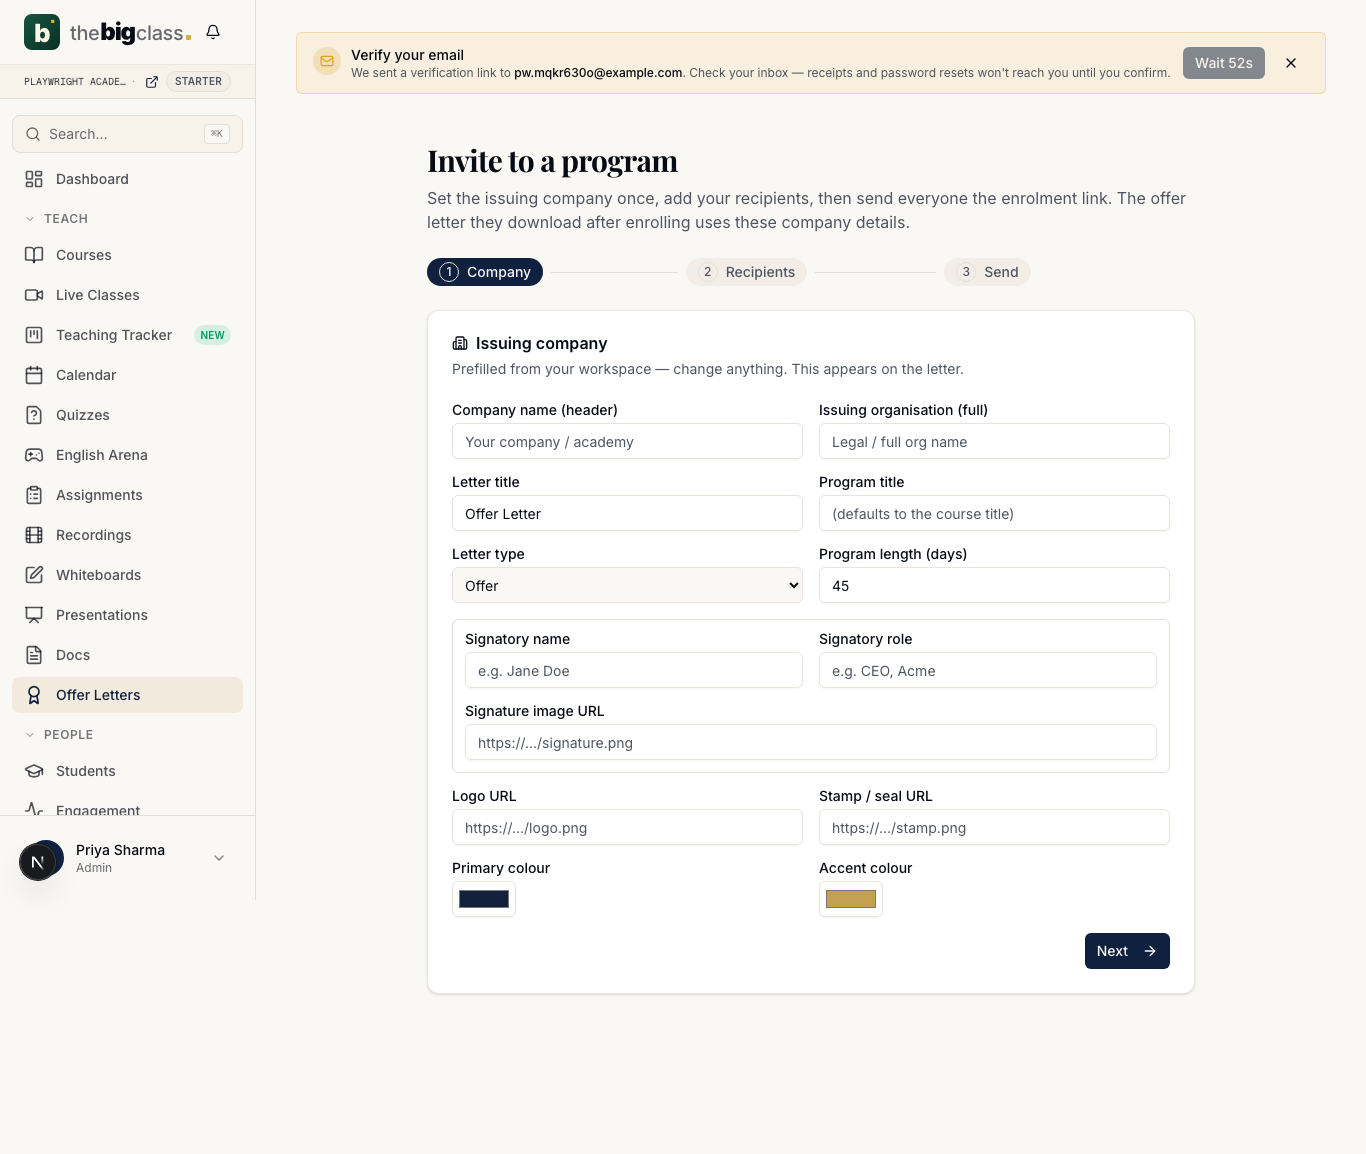
The form is prefilled with your workspace name so you can move fast, but change anything. What you set here is what appears on the letter:
- Company name — the small header line at the top of the letter (e.g. ACME ACADEMY).
- Issuing organization — the full/legal name used in the body sentence ('…delivered by Acme Pvt. Ltd.').
- Letter title + Program title — e.g. 'Internship Offer Letter' and '45-Day Full Stack Program'. Program title falls back to the course/product name if you leave it blank.
- Letter type — Offer, Enrollment, or Completion (changes the wording).
- Program length (days) — drives the End date.
- Signatory — name + role, plus an optional signature image URL (drawn above the signature line).
- Logo URL and Stamp / seal URL — hosted image links, shown in the header and over the signature area.
- Primary + accent colors — the letter recolors to match.
- Body paragraph — the warm 'here's what the program is' lines. Leave blank for a sensible default.
- Perks — a 'here's what you can look forward to' bullet list (mentorship, certificate, etc.). Optional but it's what makes the letter feel generous.
- Closing line — the 'confirm your acceptance' call-to-action above the sign-off. Defaults per letter type.
Step 2 — recipients (CSV or one-by-one)
Add the people you're inviting. Either type a name + email and click Add, or upload a CSV with name and email columns. The list is editable — remove anyone before you send. Duplicate emails are ignored.
name,email
Maya Bisht,[email protected]
Lucas Martin,[email protected]
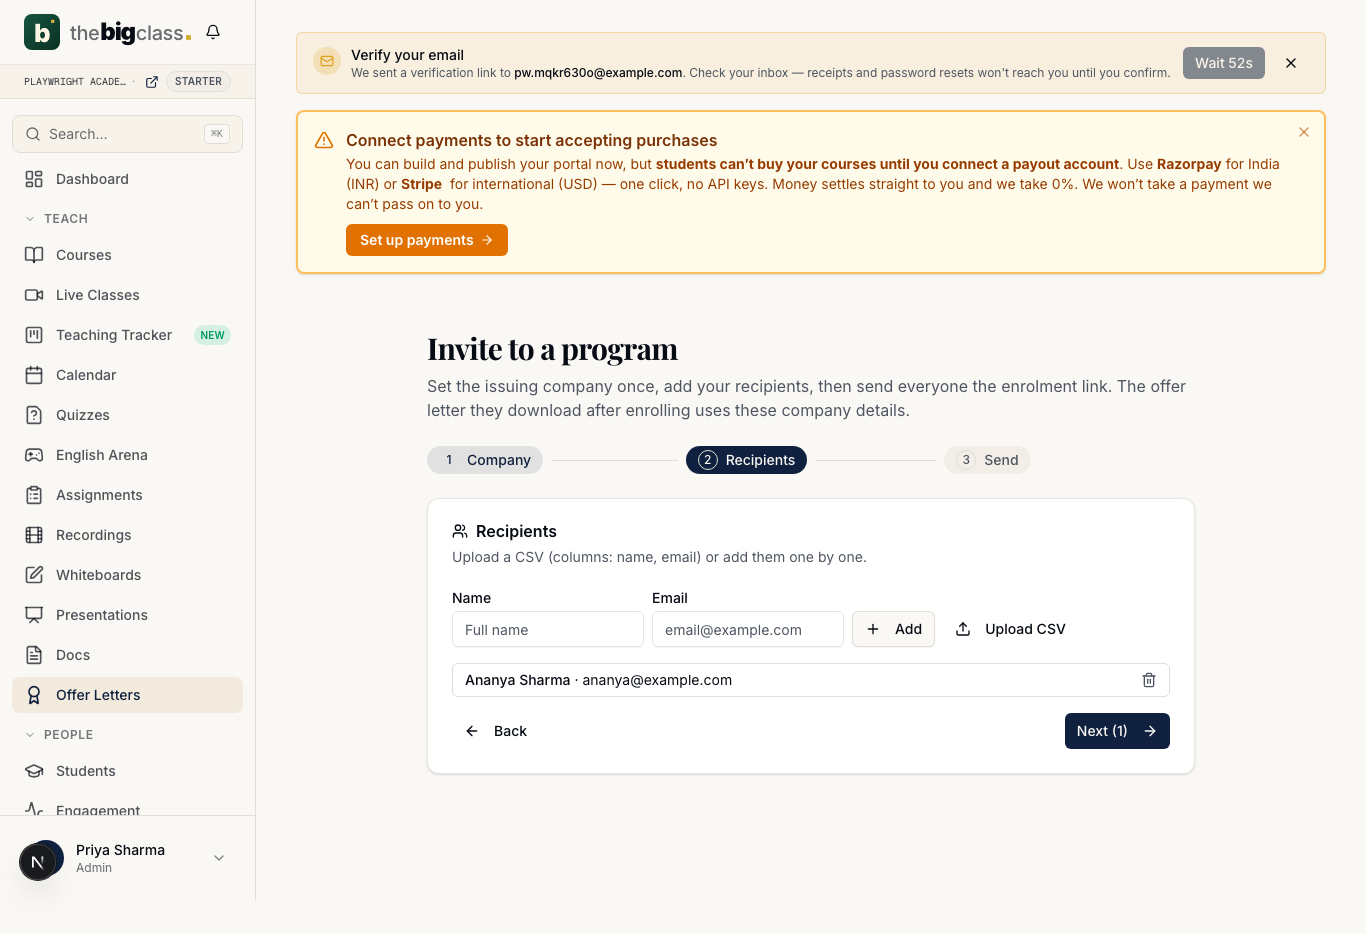
Step 3 — pick the item & send
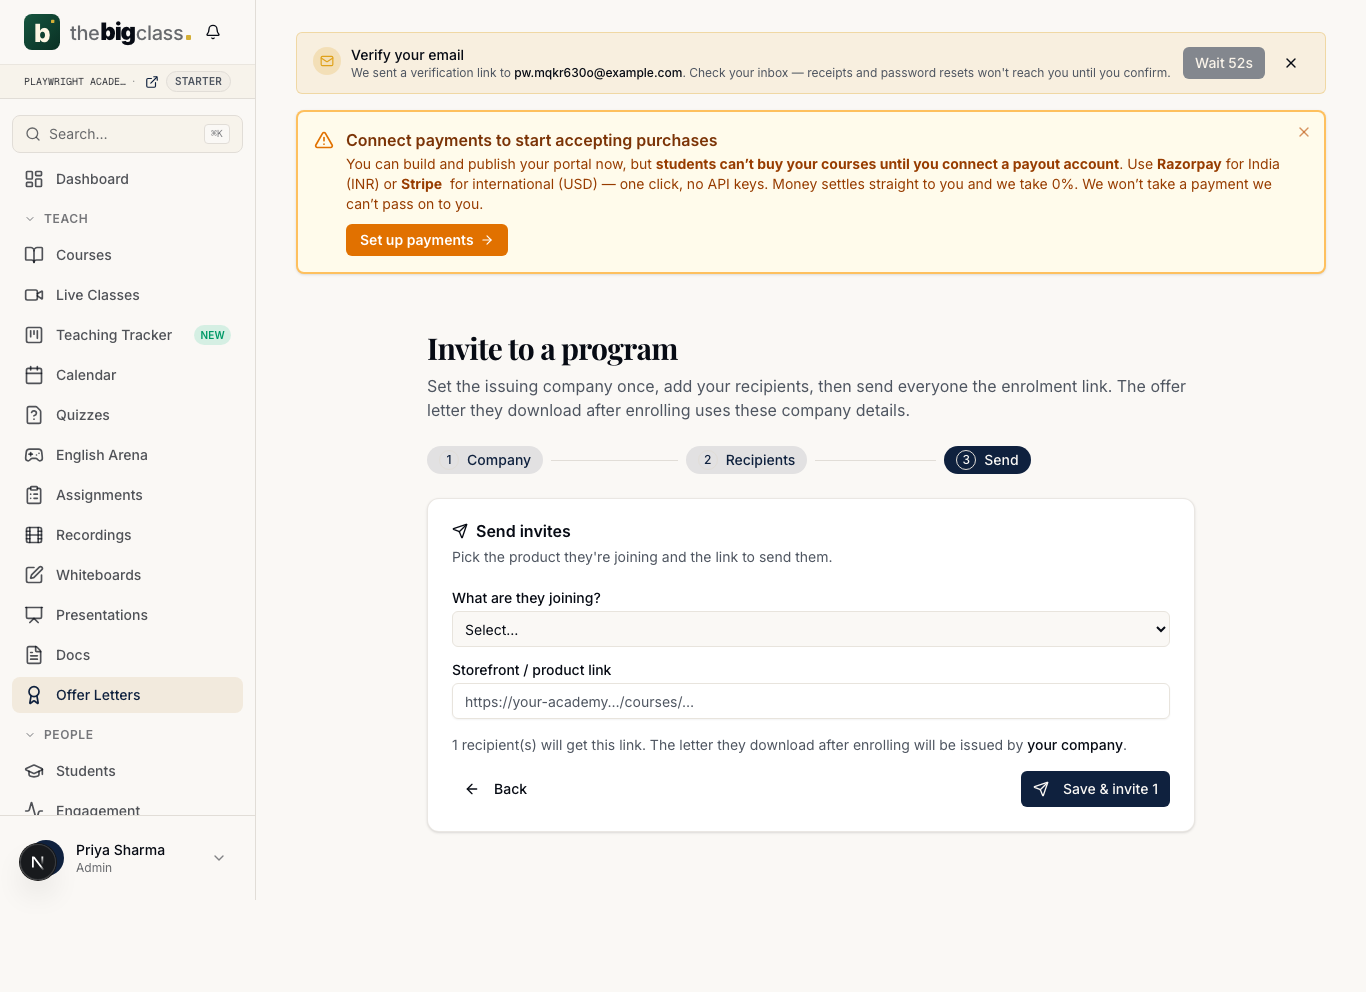
Choose what they're joining from the dropdown — a Course, a 1:1 coaching session, or a paid webinar (your published products appear grouped) — then paste the storefront link you want them to open. Hit Save & invite.
- Your company config is saved against that item, so the letter every buyer downloads later uses exactly these details.
- Everyone you invited is added as a student in your workspace.
- Each recipient is emailed the enrollment link (if email is configured on your deployment).
- You get a report: students added, invites sent, and any failures.
Who actually gets a letter
Letters are gated on real payment — there's no way to mint one without paying. A person becomes eligible the moment they have either an active course enrollment OR a paid order (for a 1:1 session or webinar) for that item.
- Course access → after enrolling, a 'Your offer letter is ready' card appears on their course page with Download, Share on LinkedIn, and a verify link.
- 1:1 / webinar → the same letter is available once their purchase is recorded as paid.
- Re-downloading is idempotent — the same person always gets the same letter and DOC-ID.
What the learner receives
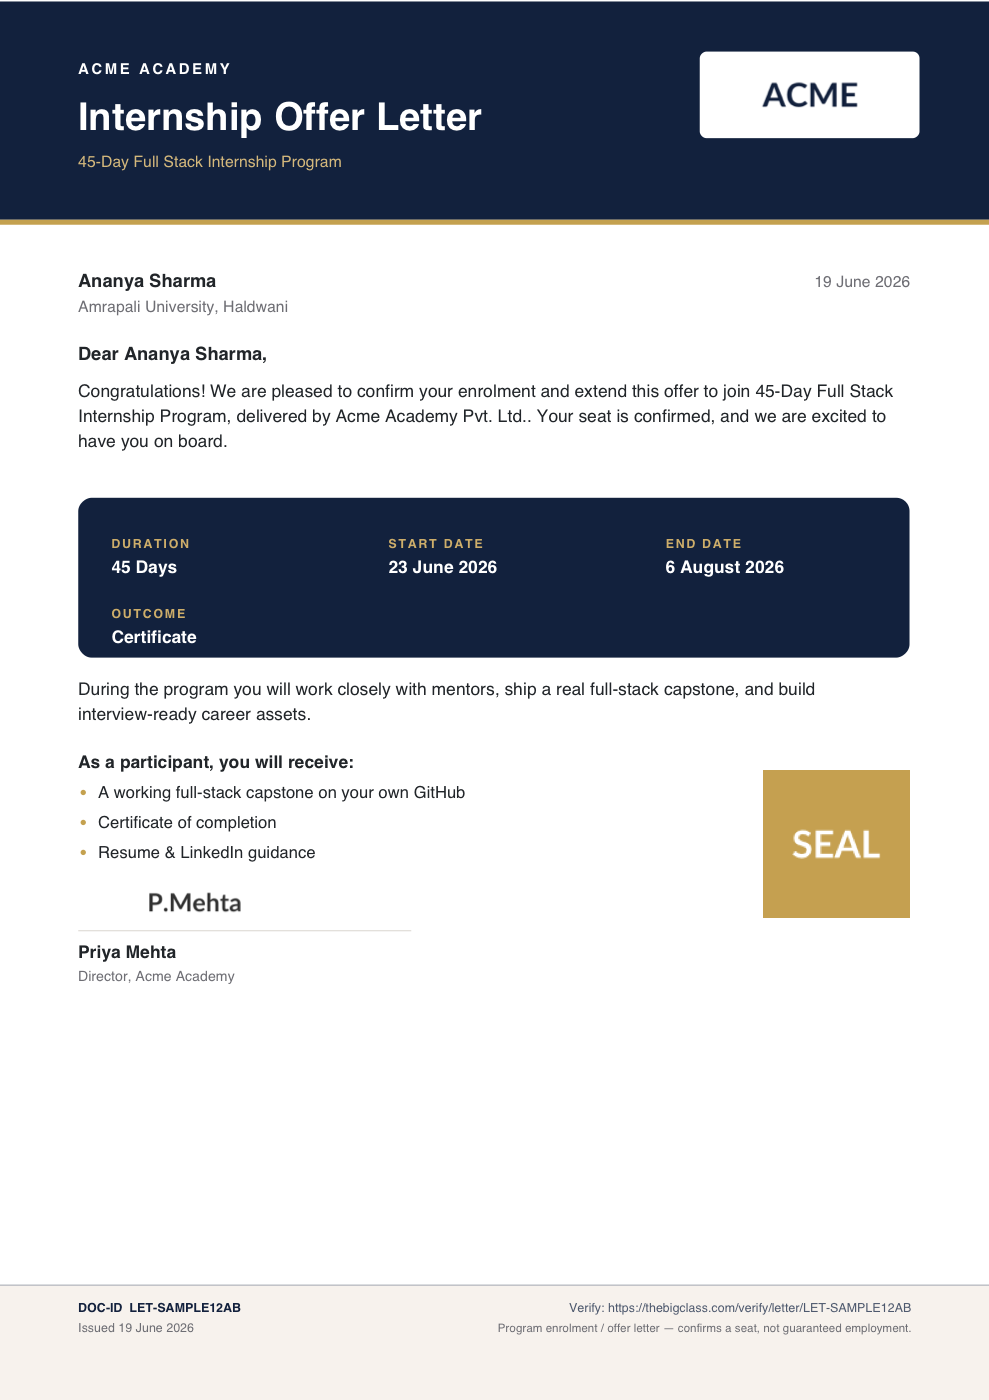
- A clean PDF on your letterhead — your logo, the program, their dates, your signatory's signature image and your stamp.
- A one-click LinkedIn share with a ready-to-paste celebratory caption.
- A public verification link, /verify/letter/<DOC-ID>, that anyone can open to confirm it's genuine. The verify page shows the program, recipient, dates and issuing academy — and never exposes their email.
The same PDF is also attached to the letter email, so the emailed copy and the downloaded copy are byte-for-byte identical.
What the letter looks like
The letter uses a modern offer-letter layout — a soft, brand-tinted page (no heavy header band), a big bold headline, and a clean color-blocked details card. Top to bottom it reads:
- Masthead — your company name (small, in the accent color), a big bold headline (the letter title), the program as a subtitle, and your logo top-right.
- Greeting — the recipient's name, their cohort, and the issue date.
- Intro — a warm, congratulatory opening that confirms their seat.
- Details card — a brand-colored block with Duration, Start, End and Outcome.
- Body + perks — your program description and the 'what you can look forward to' bullet list.
- Acceptance — a closing line inviting them to confirm, then a 'Warm regards,' sign-off with your signatory's name, role and signature image, and your stamp alongside.
- Footer — the DOC-ID, issue date, public verify link and the 'confirms a seat, not guaranteed employment' note.
Dates on the letter
By default each person's Start date is the next Tuesday on/after they joined, and the End date is Start + your program length — so a rolling-enrollment cohort gets sensible per-student dates automatically. Prefer one fixed window for everyone? Set a fixed start and end and every letter uses it.
Letter types
- Offer — 'we're pleased to confirm your enrollment and extend this offer to join…'.
- Enrollment — a straight enrollment confirmation.
- Completion — issued after the course is completed (course access only, since completion needs progress tracking); certifies they finished.
Troubleshooting
- 'No paid enrollment/purchase' — that email hasn't paid for this item yet; they'll get the letter automatically once they do.
- 'No student account' — only happens if you issue to an email you never invited; people you invite are added as students automatically.
- No emails sent — email isn't configured on this deployment; the config is still saved and learners can download from their dashboard. Share the link manually.
- Stamp/signature missing on the PDF — check the image URL is public (opens in an incognito tab) and is a PNG or JPG.
Related